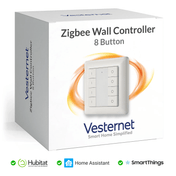
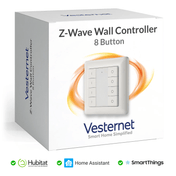
This guide shows how to add the Z-Wave.me Wall Controller into a Z-Wave home automation network using a VERA central controller and how it can be used to control various scenes.
The Z-Wave.me Wall Controller is a wall mounted Z-Wave remote control, it can be used as a standalone Z-Wave controller or most often it is added to an existing Z-Wave network as a second controller. The process to include the device into a VERA network and control scenes is relatively straightforward, however, there are a few things you need to do carefully to ensure it all goes smoothly.
When included into a VERA Z-Wave network, the Z-Wave Wall Controller can directly control other Z-Wave devices via Association or it can act as a scene controller. The Z-Wave.me Wall Controller have a single paddle that allows you to control up to 12 scenes by using different switch methods such as single click, double click, click and hold etc.
 Z-Wave.me Wall Controller Buttons
Add the the Z-Wave.me Wall Controller to VERA
- To make adding the wall controller to VERA easier, it is often best to rest the controller
- Reset the Z-Wave.me Wall Controller by holding its EXCLUDE button for 10 seconds and then press UP 3 times
- In the VERA UI go to the DEVICES tab
- Click the Add Devices tab
- Choose Add ZWave devices, like light switches..., click the 'Add' button
- In the next screen click the blue ''Option 1' button
- When the next screen appears, VERA is in 'Inclusion' mode (you will also see its orange LED flashing slowly)
- Press the Wall Controller's 'INCLUDE' button once for about 3 seconds
- The Wall Controller's LED will light green and the VERA's orange light will flash quickly
- After a few seconds VERA will say that it has found a new device and display it's ID number
- Click the blue 'Next' button, in the next screen give the controller a name and then click 'Close'
- Click the red 'SAVE' button (VERA top right)
- Wait for VERA to finish configuration and then go to the DEVICES tab
- You will now see a new Z-Wave.me Wall Controller icon in the VERA DEVICES page (or whatever name you gave the wall controller)
- If the wall controller icon shows a message 'Waiting to Configure' - press the UP button 3 times to wake it up
![]() Z-Wave.me Wall Controller Icon in VERA
Z-Wave.me Wall Controller Icon in VERA
Directly Controlling Devices (Association)
The Z-Wave.me Wall Controller can directly control devices on the Z-Wave network by associating them with the wall controller, this is its default configuration. It can control up to 10 devices in each of its association groups
- Group 1 - controls associated devices with single clicks of the Up and Down buttons
- Group 2 - controls associated devices with double clicks of the Up and Down buttons
To associate the wall controller with a device or devices:
- In VERA, click the Wall Controller's 'wrench' icon
- Go to the DEVICE OPTIONS tab
- In 'Associations' enter the group number to be used in 'Group ID' - 1 = Single Click, 2 = Double Click
- Click 'Add Group'
- Click 'Set'
- Choose the device or devices you wish to associate it with
- Click 'Back to ZWave options' (you will need to scroll down)
- Close the DEVICE OPTIONS tab and click 'SAVE' in the main VERA Window
- Wait for VERA to complete this save
 Associating the Wall Controller with other devices in VERA
Wake up the Wall Controller to finish configuration
Remember: The Wall Controller is a battery-powered device - it must be awake to accept new configuration settings
- Go to its Settings tab and click the 'Configure node right now' button
- Press the Wall Controller's UP button 3 times to wake it up
- VERA will now be able to update the wall controllers configuration settings
Controlling Scenes
The Z-Wave.me Wall Controller can also be used to trigger VERA scenes.
To do this you need to configure the Wall Controller to work as a scene controller:
- In VERA, click the Wall Controller's 'wrench' icon
- Go to the DEVICE OPTIONS tab
- In 'Configuration Settings'
- Click 'Add configuration settings' and add parameters 13 and 14
- Parameter 13 = 3 - Single click behaviour for scene control
- Parameter 14 = 3 - Double click behaviour for scene control
- Close the DEVICE OPTIONS tab and click 'SAVE' in the main VERA Window
- Wait for VERA to complete this save
 Setting the Wall Controller's Configuration Parameters in VERA
Wake up the Wall Controller to finish configuration
Remember: The Wall Controller is a battery-powered device - it must be awake to accept new configuration settings
- Go to its Settings tab and click the 'Configure node right now' button
- Press the Wall Controller's UP button 3 times to wake it up
- VERA will now be able to update the wall controllers configuration settings
Available Scene Numbers
The Z-Wave.me Wall Controller can control up to 12 different scenes, however, there is a known issue with VERA.
VERA does not correctly associate the wall controller's 'LastSceneID' with its 'sl_SceneActivated'. Any VERA scene will use the 'sl_SceneActivated' value to trigger the scene. This means that the scene numbers published in the User Manual will not be correct when used with VERA.
The scene numbers (sl_SceneActivated) reported will be unique to your VERA. To find out the correct ones for your system, do the following test process:
- On the Wall Controller, press its UP button Once - this should give a scene number of '1'
- In VERA go to the DEVICES tab
- Open the Wall Controller's icon (click its 'Wrench' icon) and go to the Advanced tab
- Scroll down until you see the 'sl_SceneActivated' and 'LastSceneID' rows
- Make a note of both values
 The Wall Controller's 'sl_SceneActivated' and 'LastSceneID' rows in VERA
- Repeat the process for all the Wall Controller's button combinations - make sure you press 'RELOAD' after each test
- You will now have a list of results similar to the following
| Button Action | LastSceneID | sl_SceneActivated | |||||||||||||||||||||||||||||||||
|---|---|---|---|---|---|---|---|---|---|---|---|---|---|---|---|---|---|---|---|---|---|---|---|---|---|---|---|---|---|---|---|---|---|---|---|
| Single Click UP | 1 | 1 | Single Click DOWN | 2 | 5 | Single Click UP and HOLD (Dim) | 3 | 2 | Single Click DOWN and HOLD (Dim) | 4 | 1 | Single Click UP, HOLD (Dim) and RELEASE | 5 | 2 | Single Click DOWN, HOLD (Dim) and RELEASE | 6 | 3 | Double Click UP | 11 | 12 | Double Click DOWN | 12 | 13 | Double Click UP and HOLD (Dim) | 13 | 14 | Double Click DOWN and HOLD (Dim) | 14 | 15 | Double Click UP, HOLD (Dim) and RELEASE | 15 | 16 | Double Click DOWN, HOLD (Dim) and RELEASE | 16 | 0 |
As you can see from this table almost all of the scene numbers are incorrect, some are missing and one Scenes 1 and 4 both return a Scene ID of 1.
Note: your values will be different so you must perform this series of tests.
Now you have this information you can use the 'sl_SceneActivated' values to trigger scenes, we have two ways to do this.
Triggering Scenes - Individual Scenes
You can create new scenes that you wish to control from the Wall Controller or use existing ones. Take a look at - Creating a VERA Scene for information about creating scenes.
To trigger the scenes using the Wall Controller:
- Click the Scenes's 'wrench' icon
- Go to the TRIGGERS tab and click the blue 'Add Trigger' button
- Go to the DEVICE OPTIONS tab
- In the drop-down list select the Wall Controller
- Select 'A Scene is Activated' from the 'What type of event is the trigger?' drop-down list
- Give the trigger a name - this makes it easy to keep track of triggers
- Enter the scene number that will activate this scene - this should be the 'sl_SceneActivated' value
- Click the blue 'Back to triggers' button
- Click the red 'SAVE' button
- This scene will now be trigged by the Wall Controller
- For more information about using triggers in VERA, see Triggering VERA Scenes
For example - using the values from my testing (above) to activate a scene by a 'Double DOWN click' we would use scene number '13'.
Triggering Devices - One Wall Controller Scene
An alternative way to do this is to create one scene that will translate the 'sl_SceneActivated' and 'LastSceneID' values and then control individual devices or scenes using LUA code.
Create a Scene and Triggers
- Create a new Scene - AUTOMATION > New Scene
- In the scene's TRIGGERS tab - create a new trigger for each Scene Number you wish to use - make sure you use the 'sl_SceneActivated' value:
- Go to the Triggers tab and click the blue 'Add trigger' button
- Select the Wall Controller in the drop-down list
- Select 'A scene is activated' in the 'What type of event is the trigger'
- Give the trigger a name
- Set the scene number to the 'sl_SceneActivated' value
- Click 'Back'
- Confirm changes by clicking the green 'Confirm changes' button
- Click 'Save' to save the changes to VERA
 Setting the Scene triggers for the Wall Controller
Add LUA Code to control individual Devices
- Go to the scene's LUUP tab
- Add the LUUP code (below) and make changes to suit your system
- Click the blue 'Save lua' button
- Click the green 'Confirm Changes' button
- Click the red 'SAVE' button
luup.call_delay('SceneControl', 1)
function SceneControl()
local TranslateIDif = luup.variable_get("urn:micasaverde-com:serviceId:SceneController1", "LastSceneID", 121)
if (TranslateIDif == "1") then
luup.call_action("urn:upnp-org:serviceId:SwitchPower1", "SetTarget", {newTargetValue = "1"}, 114)
elseif (TranslateIDif == "2") then
luup.call_action("urn:upnp-org:serviceId:SwitchPower1", "SetTarget", {newTargetValue = "0"}, 114)
end
end
LUUP Explanation
The LUUP code uses the 'LastSceneID' value to activate device actions - this enables your scenes to use the correct scene ID numbers.
- SceneControl - this is the main LUUP function (you can change it's name)
- TranslateIDif - reads the 'LastSceneID' value and uses it as the SceneID in the following lines of LUUP code
- Wall Controller ID Number - in this example it is 121, you need to change this to the correct number for your wall controller
This example scene enables:
- Single Click UP (scene ID 1) - Turns ON a TKB On/Off Socket (device ID 114)
- Single Click DOWN (scene ID 2) - Turns OFF a TKB On/Off Socket (device ID 114)
Add LUUP Code to control Scenes
Similar to the above scene LUUP example, this version can control scenes rather than individual devices:
- Go to the scene's LUUP tab
- Add the LUUP code (below) and make changes to suit your system
- Click the blue 'Save lua' button
- Click the green 'Confirm Changes' button
- Click the red 'SAVE' button
luup.call_delay('SceneControl', 1)
function SceneControl()
local TranslateIDif = luup.variable_get("urn:micasaverde-com:serviceId:SceneController1", "LastSceneID", 121)
if (TranslateIDif == "1") then
luup.call_action("urn:micasaverde-com:serviceId:HomeAutomationGateway1","RunScene",{ SceneNum="17" }, 0)
elseif (TranslateIDif == "2") then
luup.call_action("urn:micasaverde-com:serviceId:HomeAutomationGateway1","RunScene",{ SceneNum="18" }, 0)
end
end
LUA Explanation
The LUUP code works in exactly the same way as the first example, but controls scenes:
- Single Click UP (scene ID 1) - Activates Scene number 17
- Single Click DOWN (scene ID 2) - Activates Scene number 18
Reference
This application note is based on testing by Vesternet as well as invaluable contributions on the VERA Forum and on Martyn Wendon's Aceshigh blog.
Related Information


