In short: Hubitat Elevation is a small hub that runs your smart home locally, with Z-Wave and Zigbee radios built in. Plug it into your router, register it, add your devices, then build automations with its built-in apps.
Who this guide is for
- You've just bought a Hubitat Elevation hub and want to set it up properly.
- You're deciding whether Hubitat suits you and want to see what set-up involves.
- You're moving from an older Hubitat hub to a newer one.
What is Hubitat Elevation?
Hubitat Elevation is a smart home controller. It runs the wireless networks your devices use, stores your automations and links everything to your phone.
Its main difference from most hubs is that it works locally. Automations run on the hub itself, so lights still respond to motion when your broadband is down. Device data stays in your home, and the hub does not need a subscription.
You manage it from a web browser, and control your home day to day from the Hubitat mobile app.

Which protocols does Hubitat Elevation support?
| Technology | Supported? | Good to know |
|---|---|---|
| Z-Wave | Yes, built in | Current hubs use a recent Z-Wave radio (800 series at the time of writing). The UK and EU version works on 868 MHz. Check with Hubitat whether Long Range is switched on for the UK and EU version before relying on it. |
| Zigbee | Yes, built in | Zigbee 3.0, and most older Zigbee home automation devices. |
| Matter | Yes, as a controller | Matter devices on Wi-Fi or Ethernet connect over your home network. |
| Thread | No Thread radio | Matter devices that use Thread need a separate Thread border router on your network. |
| Network and cloud devices | Many, through built-in integrations | For example, a Philips Hue Bridge can be linked so Hue lights work in your automations. |
Radios change between hub generations. Check the product page for the model you are buying.
How do I set up Hubitat Elevation?
- ConnectFit the antennas, then plug the hub into your router and into power.
- RegisterFollow the set-up page to create an account and register the hub.
- Add devicesPair mains-powered devices first, then battery sensors and remotes.
- AutomateInstall a built-in app and create your first rule.
What is in the box, and what you need
- In the box: the hub, its two antennas, a power cable and an Ethernet cable.
- A spare Ethernet port on your router or network switch. Current hubs can also use Wi-Fi, but Hubitat strongly recommends a wired connection.
- A computer, tablet or phone with a web browser, on the same network. A computer is easiest for set-up.
Connecting and registering
- Choose a central spot. Keep the hub out in the open, away from metal cabinets and a little apart from your Wi-Fi router. A longer Ethernet cable is worth it.
- Fit both antennas, then connect the Ethernet cable and the power cable.
- Wait for the light on the front to turn green.
- Open the set-up page. Go to go.hubitat.com in your browser, or scan the QR code on the card in the box, and follow the steps.
- Create a Hubitat account and register the hub. Registration is what lets the mobile app and remote access find your hub.
- Install any update offered, then set your location and time zone when asked. Sunrise and sunset rules depend on them.
To get back to your hub later, visit findmyhub.hubitat.com from a device on the same network.
The web interface and the mobile app
Web interface
- Opens in any browser on your home network
- Where you add devices, install apps and change settings
- The only place the full administration pages are available
Mobile app
- For iPhone and Android
- Controls devices and shows dashboards, at home or away
- Sends notifications to your phone
- Can tell automations when you arrive or leave
Most people set things up on a computer, then use the app day to day.
Adding Z-Wave devices
Z-Wave uses different frequencies around the world. The UK and EU version of the hub uses 868 MHz, and so does every Z-Wave device we sell. A device bought in the US (908 MHz) will not pair with it. You can check the region in the hub's Z-Wave settings.
- Fit the device where it will be used. Hubitat recommends joining devices in their final position, so routes are right from the start. Add mains-powered devices first, nearest the hub, and work outwards.
- Open Devices and choose Add Device, then pick Z-Wave and start inclusion.
- Put the device into inclusion mode. This is usually one or three presses of its button. The device manual gives the exact action.
- Answer the security prompt if one appears. Devices with S2 security ask you to confirm which security levels to allow, and some ask for the PIN printed on the device (part of its DSK code).
- Name the device and give it a room.
SmartStart. Many newer Z-Wave devices carry a SmartStart QR code. Scan it with the Hubitat mobile app before you power the device, and the hub will include it securely by itself when it is switched on.
Used before? A Z-Wave device that was joined to another hub must be excluded or factory reset first. The hub can run an exclusion on any device, even one it has never seen.
Removing a device. Open the device's page, choose Remove, then put the device into exclusion mode. Removing it this way keeps the network clean.
In-wall modules and wall switches connect to mains wiring. That work must be done by a competent person and must comply with local regulations.
Adding Zigbee devices
Zigbee uses the same 2.4 GHz band everywhere, so there is no region to check.
- Open Devices and choose Add Device, then pick Zigbee and start pairing.
- Put the device into pairing mode. This is usually a button held for a few seconds, or a battery tab pulled out. A device that has been used before needs a reset first.
- Name it when the hub finds it.
Pair plugs and in-wall modules before battery sensors. Mains-powered Zigbee devices pass messages on, and sensors join through the nearest one. See Zigbee explained for how to keep Zigbee clear of your Wi-Fi.
Adding Matter devices
Hubitat can control Matter devices alongside Z-Wave and Zigbee. A brand new Matter device can be set up with the Hubitat mobile app. If the device is already in Apple Home, Google Home or Alexa, don't use the code printed on it. Ask that app to share the device, and enter the new pairing code it gives you.
Built-in apps: your first automation
In Hubitat, automations are made with built-in apps. Open Automations in the left-hand menu and add the one you want. On older hub software they are under Apps. Three cover most homes:
Basic Rules
Simple "when this happens, do that" rules, built from plain sentences. The best place to start.
Room Lighting
Made for lights. Turns a room's lights on and off by motion, time of day, a button or a door opening, at the levels you choose.
Rule Machine
The full rule engine. Triggers, conditions, delays and variables for anything the simpler apps can't do.
Example: hall light on with motion
- Open Automations, add Room Lighting and name it "Hall".
- Choose the hall dimmer as the light to control, and set the level you want.
- Choose the motion sensor as what turns the light on, and limit it to after sunset.
- Choose to turn off when motion stops, with a two minute delay.
Walk through the hall to test it. Z-Wave and Zigbee networks take a few hours to settle after you add devices, so a slow first response often improves by itself.
Dashboards
A dashboard is a screen of tiles for controlling and checking devices. Hubitat has two built-in dashboard apps. Easy Dashboard lays tiles out for you and is the quick way to start. Hubitat Dashboard gives you full control of the layout. Either can be opened in a browser, on a wall tablet or in the mobile app.
Backups
The hub keeps regular backups of its own database. Open Settings and choose Backup and Restore to download a copy to your computer. Do this before large changes, and every so often keep one somewhere safe.
A local backup holds your device list, apps, settings and any custom code. It does not carry Z-Wave or Zigbee pairings across to a different hub. Regular cloud backups that include the radios are part of a paid Hubitat service. Moving up from an older hub to a newer one is separate and free (see below).
Moving to a new Hubitat hub
Hub migration
Moves everything to the new hub, including Z-Wave and Zigbee devices, without pairing them again. Hubitat's migration tool is free when you move up from an older model to a newer one. For a like-for-like swap, check Hubitat's migration guide first. The Migrate option is on the Backup and Restore page.
Backup and re-pair
Restore a local backup on the new hub, then pair every device again. Reset each Zigbee device and it usually rejoins under its old entry. Exclude and include each Z-Wave device. It may come back as a new entry. If so, point each app and rule at the new entry and delete the old one. Free, but slow with a large system.
Keep the old hub powered off but untouched until the new one is working. More in Upgrading or moving to a new hub.
Community drivers
A driver tells the hub how to talk to one kind of device. Hubitat includes drivers for the devices on its compatibility list, and many unlisted Z-Wave, Zigbee and Matter devices work with its generic ones.
Where a device needs more, the Hubitat community often has a driver for it. Community drivers are added in the developer section of the web interface. Many people use Hubitat Package Manager, a community-made app, to install them and keep them updated. Hubitat does not test community code, so add only what you need.
Using Vesternet devices with Hubitat
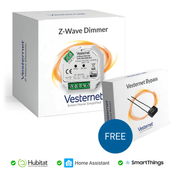
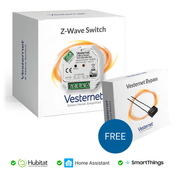
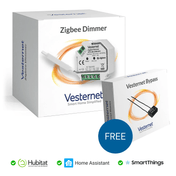
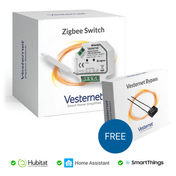
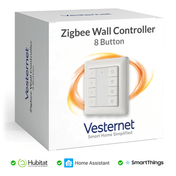
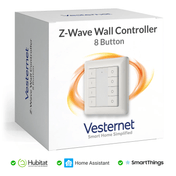
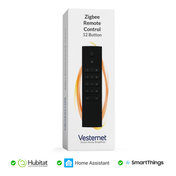
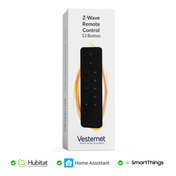
Vesternet own-brand Z-Wave and Zigbee devices are supported on Hubitat Elevation. Each one has its own set-up guide covering pairing, settings and button events for automations.
Vesternet device support for Hubitat
Troubleshooting
- I can't find the hub. Check the light. Green is normal. If it is off, check the power cable and adapter. If it is any other colour, check Hubitat's instructions for what it means. Hubitat's Diagnostic Tool can restart the hub. Only pull the power as a last resort. Then try findmyhub.hubitat.com from a device on the same network.
- A Z-Wave device won't include. Run an exclusion on it first, then try again. Check it is an 868 MHz device.
- A sensor keeps dropping off. It is probably too far from a mains-powered device. Add a plug or module between it and the hub. See Building a reliable network.
- A device paired but doesn't work properly. It may have been given the wrong driver. Change the Type on the device's page, save, then choose Configure.
- Z-Wave has become slow. A device that was removed badly can leave a dead entry behind. The Z-Wave Details page in Settings lists every node and lets you remove failed ones.
- The device isn't supported. Check before you buy. See Will it work with my system?
For step-by-step help with pairing, see Adding and removing devices. Still choosing a hub? See Choosing a smart home controller.
Devices that work with Hubitat
 In-wall dimmersFit behind your existing switch
 Wall controllersBattery buttons that trigger rules
 Motion sensorsFor lighting and security
 Door and window sensorsKnow what is open
 Smart plugsSwitch appliances and strengthen the mesh
 Leak sensorsEarly warning under sinks and appliances