There is a quiet frustration building among smart home enthusiasts, and it is entirely justified. Cloud-dependent automation systems have long promised convenience, but the reality often involves sluggish response times, unexpected outages, and an uncomfortable reliance on third-party servers that may one day simply disappear. When a vendor discontinues support or suffers a server failure, entire smart home ecosystems can become unresponsive overnight — leaving behind expensive hardware and broken routines. Add in the growing concern over data privacy, and it becomes clear why homeowners are actively seeking an alternative. The shift toward locally controlled smart home networks is not a niche preference; it is a rational response to the limitations of cloud-first design.
The solution lies in building your smart home around a Home LAN — a local area network that keeps all communication between devices contained within your own home. At the centre of this approach sits Home Assistant, an open-source automation platform that runs entirely on your local network, requiring no cloud subscription or external server to function. The result is a system with sub-second response times, full data ownership, offline functionality, and the flexibility to integrate both Z-Wave and Zigbee devices under one roof. It is, by almost every measure, the most capable and resilient smart home architecture available to homeowners today.
This guide covers everything you need to understand and build such a system. From grasping the fundamentals of local network architecture and planning your LAN infrastructure, to deploying Home Assistant, designing a wireless mesh, and adding physical control points like switches, wall controllers, and remotes — every section is designed to give you the knowledge to build a smart home that works entirely on your terms.
Understanding Local Smart Home Networks: What Is a Home LAN and Why It Matters
A Home LAN, or local area network, is the private network infrastructure within your home that connects all of your devices — computers, phones, smart speakers, and increasingly, smart home hardware. In the context of home automation, the LAN becomes the communication backbone that allows devices to send and receive signals without ever leaving your property. Understanding what this means in practice is the essential first step before selecting any hardware or platform.
Cloud vs. Local: The Core Trade-Off
Cloud-based smart home systems route every command through an external server. When you tap a button in an app to turn on a light, that signal travels from your phone, out through the internet, to a manufacturer's server, and back again — a round trip that introduces latency and introduces a point of failure. Local LAN architectures eliminate this entirely. Commands are processed within the network itself, meaning response times are near-instant and the system continues to function even if your broadband connection drops.
- Cloud systems introduce latency from external server round trips
- Local systems respond in milliseconds using your Home LAN
- Vendor shutdowns cannot affect a locally hosted system
- Your automation data never leaves your own network

How Smart Home Devices Use Your Local Network
IP-based smart home devices — such as Wi-Fi bulbs or network-connected thermostats — communicate directly over your home network using standard internet protocol addressing. Zigbee and Z-Wave devices operate differently; they communicate over their own dedicated radio frequencies and connect to your LAN through a coordinator or controller device. This coordinator acts as a bridge, translating radio signals into network messages that Home Assistant can understand and act upon.
The Network Neighbourhood Explained
The concept of a network neighbourhood refers to the collection of devices that can discover and communicate with each other within the same local network. In a smart home context, your network neighbourhood includes every device registered to your LAN — from your Home Assistant server to your Zigbee sensors and Z-Wave switches. Crucially, all of this discovery and communication happens internally. No traffic is routed externally, which is exactly what makes a HomeAssistant LAN setup so private, fast, and resilient.
Planning Your Home LAN Infrastructure: Architecture Before Hardware
One of the most common mistakes in smart home projects is purchasing hardware before understanding the network that needs to support it. Planning your Home LAN infrastructure first saves time, money, and the frustration of retrofitting a poorly designed network around devices that are already installed.
Assessing Your Home's Coverage Zones
Begin by walking through each room and noting the specific connectivity demands. Consider how many devices you plan to install per zone, and pay close attention to building materials. Thick stone walls, concrete floors, and metal-framed structures all attenuate wireless signals. Identifying these dead zones before deployment allows you to plan extender placement and protocol selection accordingly.
- Map rooms against planned device density
- Note signal-blocking materials such as concrete and stone
- Identify locations for mains-powered routing devices
Choosing a Network Topology: Star, Mesh, or Hybrid
A star topology connects every device directly to a central hub, which is simple but creates a single point of failure. A mesh topology allows devices to relay signals through one another, creating redundant pathways that self-heal if a node fails. For smart home environments — particularly those using Zigbee or Z-Wave — a mesh topology is almost always preferred, as it delivers both range and reliability without relying on any single connection point.

Separating IoT Traffic: VLANs and Network Segmentation
Placing your smart home devices on a dedicated VLAN — a virtual local area network — separates IoT traffic from your personal devices. This isolation improves both security and network performance. If a smart home device is compromised, it cannot communicate with your laptops or phones on the primary network. Most modern routers and managed switches support VLAN configuration, and Home Assistant operates perfectly within a segmented network environment.
Bandwidth and Latency Considerations for Automation
Smart home traffic is fundamentally different from video streaming or online gaming. Individual commands are tiny packets of data, but the system demands low latency and consistent delivery. Dropped packets can mean a light that fails to turn on or a sensor that misses a trigger. When selecting your router and switch hardware, prioritise quality of service settings and consistent throughput over raw bandwidth figures.
Choosing Your Smart Home Controller: Gateways, Hubs, and USB Sticks
The controller sits at the heart of your Home LAN, acting as the translator between your wireless smart home devices and the automation platform. There are two primary hardware approaches, each suited to different use cases and skill levels.
All-in-One Gateway Hubs
Gateway hubs are purpose-built devices that unify control of multiple wireless protocols in a single enclosure. They typically support Zigbee, Z-Wave, and sometimes additional protocols simultaneously, and they connect to your LAN via Ethernet or Wi-Fi. For homeowners who want a clean, integrated setup without managing separate components, a gateway hub provides an excellent foundation. Many models offer remote access capabilities while remaining anchored entirely to the local network.
USB Controller Sticks for PC and Raspberry Pi
For those building a fully custom HomeAssistant LAN setup, USB controller sticks offer a flexible and cost-effective alternative. These compact dongles plug directly into a Raspberry Pi or home server and give Home Assistant direct access to Z-Wave or Zigbee radio frequencies. They are the preferred choice for tech-savvy users who want granular control over every aspect of their network configuration.
- Compact and affordable for custom builds
- Compatible with Raspberry Pi and standard home servers
- Support both Zigbee and Z-Wave protocols
- Integrate directly with Home Assistant software
Which Option Is Right for You?
The right controller depends on your technical confidence, budget, and how many devices you plan to manage. Beginners or those who want a straightforward setup tend to benefit most from a gateway hub. Advanced users building a deeply customised system on a Raspberry Pi will typically prefer USB sticks for the flexibility they offer.
Soft Product Recommendation
Vesternet carries a curated range of gateway hubs and USB controller sticks to suit both approaches. Browsing those collections is a practical starting point for anyone ready to move from planning to hardware selection.
Deploying Home Assistant on Your Local Network
Home Assistant is the automation brain of your Home LAN. It runs entirely on your local network, processes all automations internally, and communicates with devices via IP, Zigbee, and Z-Wave without ever requiring a cloud connection. Understanding how it fits into your network architecture is more valuable than following a generic installation checklist.
What Home Assistant Does on Your LAN
Home Assistant acts as a locally hosted platform that aggregates device states, processes automation logic, and surfaces control interfaces — all within your network neighbourhood. When a motion sensor detects movement, Home Assistant receives that signal locally, evaluates any relevant conditions, and sends the appropriate command to the target device. The entire sequence happens in milliseconds, entirely within your Home LAN.
Running Home Assistant: Hardware Platform Options
Home Assistant can run on a range of hardware, each offering different trade-offs in performance and expandability.
- Raspberry Pi 4 or 5 — affordable and widely used for entry-level deployments
- Home Assistant Green — a purpose-built, plug-and-play Home Assistant appliance
- Home Assistant Yellow — includes built-in Zigbee radio and M.2 storage expansion
- Intel NUC or mini PC — ideal for larger installations requiring higher processing headroom
Integrating Zigbee and Z-Wave Into Home Assistant
Zigbee and Z-Wave devices connect to Home Assistant through either a USB coordinator stick or a built-in radio, depending on the chosen hardware platform. The Zigbee Home Automation (ZHA) integration or Zigbee2MQTT handles Zigbee communication, while the Z-Wave JS integration manages Z-Wave devices. Both create a unified device ecosystem within Home Assistant, presented through a single interface regardless of the underlying radio protocol.
Network Discovery and Device Onboarding
Home Assistant uses mDNS and Zeroconf protocols to discover compatible devices on the local network automatically. For stable operation, it is strongly recommended to assign fixed IP addresses to your Home Assistant server and any network-connected smart home devices using DHCP reservations on your router. This ensures that automations continue to target the correct device address even after a router restart.
Building Your Wireless Mesh: Z-Wave and Zigbee Network Design
A well-designed wireless mesh is the foundation of a reliable local smart home network. Both Zigbee and Z-Wave use mesh topology to extend coverage and maintain connectivity even when individual nodes become unavailable. Understanding how each protocol constructs its mesh is critical to designing a system that performs consistently.
How Zigbee Mesh Networks Work
Zigbee networks are built on a three-tier hierarchy: coordinator, routers, and end devices. The coordinator — typically your USB stick or gateway hub — manages the network. Mains-powered devices such as smart plugs and in-wall switches act as routers, relaying signals between the coordinator and end devices. Battery-powered sensors are usually end devices, which only transmit and receive but do not route signals for others. When a router node fails, the mesh automatically reroutes traffic through available alternatives.
How Z-Wave Mesh Networks Work
Z-Wave operates on a licensed sub-GHz frequency — 868 MHz in Europe — which sits well below the crowded 2.4 GHz band used by Wi-Fi and Zigbee. This frequency advantage significantly reduces interference in environments with many wireless devices. Z-Wave networks support up to 232 devices and use the same mesh routing behaviour as Zigbee, with mains-powered devices acting as repeaters to extend signal range across the home.
Zigbee vs. Z-Wave: Choosing the Right Protocol for Your LAN
- Zigbee offers a larger device ecosystem and lower average device cost
- Z-Wave benefits from dedicated frequency with no Wi-Fi interference
- Both protocols integrate natively with Home Assistant
- Z-Wave enforces strict interoperability certification across devices

Extending Coverage with Smart Plug Range Extenders
Plug-in range extender devices are one of the most practical tools for strengthening a wireless mesh. Because they are mains-powered, they act as active routing nodes — receiving and re-transmitting signals to devices that would otherwise fall outside the mesh's reach. In large homes or properties with signal-blocking construction, placing range extenders at strategic midpoints between the coordinator and outlying sensors dramatically improves mesh reliability.
Designing for Mesh Density: Avoiding Weak Nodes
A common design error is placing too few routing devices between the coordinator and distant end devices. If a battery-powered sensor can only communicate through a single router, and that router becomes unavailable, the sensor is effectively isolated. Aim for every end device to have at least two routing nodes within range, and distribute mains-powered devices throughout your coverage zones rather than clustering them near the coordinator.
Building LAN-Based Automations in Home Assistant
Infrastructure without automation is simply a network of connected devices. The real value of a Home LAN built around Home Assistant lies in its ability to execute complex, intelligent routines entirely locally — no cloud dependencies, no latency, no failure points beyond your own hardware.
The Anatomy of a Home Assistant Automation
Every automation in Home Assistant consists of three elements: a trigger, optional conditions, and one or more actions. A trigger defines what initiates the automation — a motion sensor detecting movement, a time of day being reached, or a device changing state. Conditions narrow the circumstances under which the action fires — for example, only triggering if the sun has set. Actions define what happens — turning on a light, adjusting a thermostat, or activating a multi-device scene.
- Trigger: motion sensor detects presence in hallway
- Condition: time is between sunset and 23:00
- Action: turn on hallway lights at 60% brightness

Room-Based vs. Global Automations
Structuring automations by physical zone — room, floor, or outdoor area — makes them significantly easier to maintain as your system grows. Room-based automations are self-contained and can be modified without risk of unintended effects elsewhere. Global automations, such as an "all lights off" goodnight routine, should be used sparingly and documented clearly to avoid conflicts with zone-level logic.
Local Voice Control and Display Dashboards
Home Assistant includes a built-in voice assistant called Assist, which processes commands entirely on your local network. Lovelace dashboards provide a fully customisable visual interface accessible from any browser on your Home LAN. Both tools enable complete smart home control without involving any external cloud service — a significant advantage for privacy-conscious households.
Reliability by Design: Why Local Automations Outperform Cloud Routines
Cloud-dependent routines fail the moment your internet connection drops. Local automations running on your Home LAN have no such vulnerability. Heating schedules run on time, security automations trigger instantly, and lighting scenes activate without hesitation — regardless of whether your broadband is functioning. For automations that affect comfort, safety, or security, this reliability difference is not a minor convenience; it is a meaningful practical advantage.
Physical Control Points: Switches, Wall Controllers, and Remotes
A smart home built entirely around app and voice control creates a frustrating experience for anyone who simply wants to turn on a light without unlocking their phone. Physical control points — switches, wall controllers, and handheld remotes — are an essential layer of any well-designed Home LAN, making the system accessible to every member of the household.
Why Physical Controls Still Matter in a Smart Home
Guests, children, and elderly residents should not need to understand an app to interact with your home. Tactile switches and buttons provide instant, intuitive control that requires no learning curve. In Home Assistant, these physical controls communicate over Z-Wave or Zigbee and trigger the same local automations as any other input — keeping the system fast and reliable while remaining genuinely usable for everyone.
Wireless Smart Switches for Lighting and Appliances
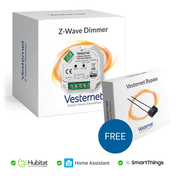
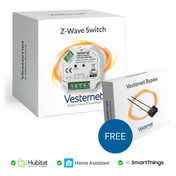
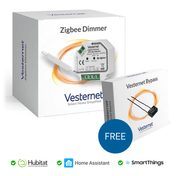
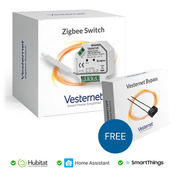
Wireless smart switches replace or complement traditional wiring, offering control over lighting and connected appliances without requiring dedicated neutral wire configurations in all cases. Beyond simple on/off control, they support scheduling, energy monitoring, and scene triggering — all communicated locally over the mesh. Their integration with Home Assistant means that a single switch press can initiate a multi-device scene rather than controlling just one load.
- Replace or augment traditional wiring configurations
- Support scheduling and energy monitoring locally
- Trigger multi-device scenes via Home Assistant
- Communicate over Z-Wave or Zigbee without cloud dependency
Wall Controllers: Centralised Scene and Room Control
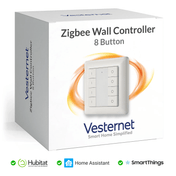
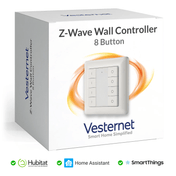
Multi-button wall controllers offer a sleek, permanent control panel for an entire room or zone. A single panel can be programmed to trigger complex Home Assistant scenes — dimming lights for a film, adjusting heating, arming a security routine, or switching between preset moods — all from one elegantly mounted device. Because they operate over the local mesh, every button press is processed entirely within your Home LAN with no cloud involvement.
Handheld Remote Controllers for Flexible On-the-Go Automation
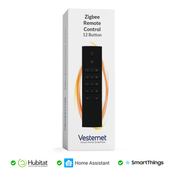
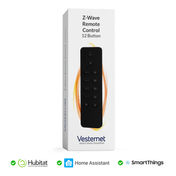
Handheld remotes provide portable, room-agnostic control over smart home scenes and device groups. In living areas, open-plan spaces, and bedrooms, they offer the convenience of a dedicated controller without requiring a phone or tablet. Programmed through Home Assistant, each button can be mapped to any local automation or scene — providing a level of flexibility that makes day-to-day smart home use genuinely effortless.
Maintaining, Securing, and Future-Proofing Your Home LAN
A local smart home network requires ongoing attention to remain healthy, secure, and ready to accommodate new technology. The good news is that a well-designed Home LAN is inherently easier to maintain and expand than cloud-dependent alternatives, provided you follow a few consistent practices.
Network Security Best Practices for Smart Homes
Security begins with firmware discipline. Keep all devices — including your router, Home Assistant host, and smart home hardware — updated with the latest firmware releases. Use strong, unique passwords for your Wi-Fi networks, and enforce VLAN isolation to keep IoT devices separated from personal computing devices. Where possible, disable cloud-sync features on locally controlled devices to reduce the external attack surface.
- Update firmware on all devices regularly
- Use separate VLANs for IoT and personal devices
- Disable unused cloud features on local devices
- Apply strong passwords across all network access points
Monitoring Your LAN: Keeping Tabs on Connected Devices
Home Assistant includes built-in tools for tracking device states and connectivity. Integrations such as the network scanner or device tracker can flag devices that go offline unexpectedly, allowing you to identify failing nodes before they disrupt automations. Regularly reviewing your network neighbourhood for unexpected devices is also a sound security habit that takes only a few minutes each month.
Scaling Your Network: Adding Devices Without Breaking Automations
Expanding a Z-Wave or Zigbee mesh incrementally is straightforward if you plan for it from the beginning. Add new mains-powered devices before battery-powered end devices to ensure the routing infrastructure grows ahead of demand. When introducing new device categories — sensors, switches, or thermostats — test their integration in Home Assistant before referencing them in live automations to avoid triggering incomplete or conflicting routines.
Future-Proofing with Matter and Thread
Matter is an emerging smart home interoperability standard backed by major technology companies, designed to enable seamless communication between devices from different manufacturers. Thread is the underlying mesh networking protocol that Matter uses for low-power devices — and it shares significant architectural similarities with Zigbee and Z-Wave mesh design. Home Assistant already supports Matter natively, meaning a locally anchored Home LAN built today is well-positioned to incorporate these new standards without requiring a full system replacement.
Conclusion
Building a local smart home network with Home Assistant at its core is one of the most empowering decisions a homeowner can make. By anchoring your automation infrastructure to your Home LAN rather than the cloud, you gain true ownership of your data, near-instant response times, and a system that keeps working even when your internet connection does not. From designing a resilient Zigbee or Z-Wave mesh to wiring in physical wall controllers and switches as intuitive control points, every layer of a well-built home LAN contributes to a smarter, more reliable, and more private living environment.
The good news is that you do not need to build everything at once. Start with your coordinator — a gateway hub or USB stick connected to a Raspberry Pi — get Home Assistant running locally on your network, and begin adding devices one zone at a time. Focus on mesh density early by placing mains-powered range extender devices strategically throughout your coverage areas, and layer in physical controls like wireless switches and wall controllers to make the system accessible to everyone in the household. Each step compounds on the last, and before long your home network neighbourhood becomes a genuinely intelligent ecosystem that works entirely on your terms.
Ready to explore the hardware that powers a local smart home network? Browse Vesternet's curated range of smart home gateway hubs and USB controller sticks to find your ideal Home Assistant platform, then explore the Z-Wave and Zigbee device collections to start building your wireless mesh. Add plug-in range extenders to maximise coverage, and complete your setup with wireless smart switches, wall controllers, and handheld remotes for intuitive physical control at every point in your home. If you are unsure where to start, Vesternet's expert team is on hand to help you choose the right technology for your home's layout, protocol preference, and automation goals.