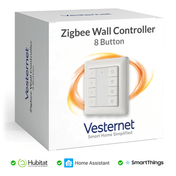
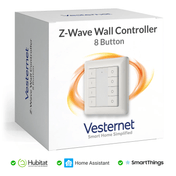
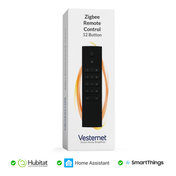
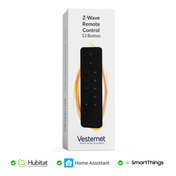
In short: Homey Pro is an all-in-one smart home hub that you set up and run from the Homey app. Plug it in, add it in the app, install an app for each brand you own, pair your devices, then automate them with Flows.
Who this guide is for
- You've just bought a Homey Pro and want to get it running.
- You're adding Z-Wave, Zigbee or Matter devices to Homey for the first time.
- You're weighing up Homey Pro against the other Homey products.
What is Homey Pro?
Homey Pro is a smart home controller made by Athom in the Netherlands. It has more radios built in than almost any other hub: Z-Wave, Zigbee, Thread, Matter, Bluetooth, Wi-Fi, 433 MHz and infrared.
It runs your home locally, so automations keep working when the internet is down. Everything is done from one app on your phone, or from the Homey web app on a computer.

Homey Pro, Homey Pro mini, Homey Cloud or Homey Bridge?
The Homey name covers several products, including Homey Self-Hosted Server. This guide is about Homey Pro, but it helps to know the others.
| Product | Radios built in | Where it runs | Good to know |
|---|---|---|---|
| Homey Pro | Z-Wave, Zigbee, Thread, Matter, Bluetooth, Wi-Fi, 433 MHz, infrared | Locally, on the hub | The full version. A wired network connection needs an optional Ethernet adapter. |
| Homey Pro mini | Zigbee and Thread | Locally, on the hub | Supports Matter. Wired network only, no Wi-Fi. No Z-Wave by itself. Adding a Homey Bridge gives it Z-Wave, Bluetooth, 433 MHz and infrared. |
| Homey Cloud | None (no hardware) | In the cloud | For brands that connect through their own cloud service. No Matter, Thread, local network devices or community apps. Needs a Homey Bridge for Z-Wave and Zigbee, and an internet connection at all times. |
| Homey Self-Hosted Server | None | On your own computer or server | Homey software that you run on your own hardware. Needs a Homey Bridge for Z-Wave and Zigbee. |
| Homey Bridge | Z-Wave, Zigbee, Bluetooth, 433 MHz, infrared | An add-on, not a hub | Adds radios to the others, or extends Homey Pro's range (see satellite mode below). It connects to your network by Wi-Fi. |
If you want Z-Wave devices and local control in one box, choose Homey Pro. Product ranges change, so check the product page for what each model includes.
How do I set up Homey Pro?
- Plug it inPlace Homey Pro somewhere central and connect the power adapter.
- Add it in the Homey appCreate a Homey account and follow the set-up in the app.
- Install apps and add devicesOne app per brand, then pair each device.
- Create a FlowTell Homey what should happen, and when.
Set-up in the Homey app
- Choose a central spot, in the open and off the floor. Keep it a little away from your Wi-Fi router and from large metal objects.
- Connect the power adapter supplied in the box and wait for Homey Pro to start.
- Install the Homey app on your iPhone or Android phone, and create a Homey account or sign in.
- Add your Homey Pro in the app and follow the steps on screen. The app finds the hub, asks for your Wi-Fi details and connects it.
- Let it update. Homey Pro may download new software during set-up. Leave it powered until it has finished.
- Create your rooms. Homey calls these zones. Devices and Flows are organised by them.
Once it is running, you can also sign in to the Homey web app at my.homey.app from a computer. The bigger screen makes building automations easier.
Installing apps for your brands
Homey supports each brand through an app, installed on the Homey Pro itself from the Homey App Store. An app teaches Homey how to pair that brand's devices and what they can do.
- Official apps are made by Athom or by the brand.
- Community apps are made by other Homey users. They are available on Homey Pro and widen the choice a great deal.
You rarely need to install an app by hand. When you add a device and choose its brand, Homey offers to install the right app first.
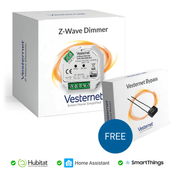
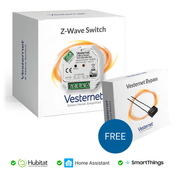
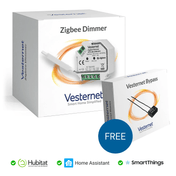
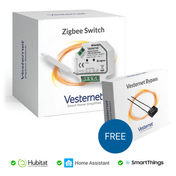
Vesternet own-brand devices have their own app in the Homey App Store. Search for Vesternet when you add a device.
Adding Z-Wave devices
Z-Wave uses different frequencies around the world. In the UK and Europe it is 868 MHz, and your hub and your devices must both use it. Everything in our Z-Wave range is 868 MHz, but a device bought in the US (908 MHz) will not pair. If you are unsure how your Homey Pro is set, check Homey's instructions.
- Fit or place the device where it will be used. Add mains-powered devices first, as they pass messages on for the others.
- Start adding a device in the Homey app and choose the brand, then the exact device.
- Follow the instructions on screen. Homey shows how to put that model into pairing mode, usually one or three presses of its button.
- Enter the security code if asked. Devices with S2 security may ask for a PIN printed on the device or its box.
- Name the device and put it in a zone.
A Z-Wave device that has been joined to another hub must be removed from it, or factory reset, before it will pair. Homey can run a removal on any Z-Wave device from its Z-Wave settings. This is also the first thing to try when a device refuses to pair.
In-wall modules and wall switches connect to mains wiring. That work must be done by a competent person and must comply with local regulations.
Adding Zigbee devices
Zigbee uses the same 2.4 GHz band worldwide, so there is no region to check. The steps are the same as for Z-Wave: start adding a device, choose the brand and model, then put the device into pairing mode when Homey asks. This is usually a button held for a few seconds.
Pair plugs and in-wall modules before battery sensors, and pair sensors in the room where they will live. See Zigbee explained for why this matters.
Matter and Thread
Homey Pro is a Matter controller and has a Thread border router built in, so it needs no extra hub for either.
- Start adding a device in the Homey app and choose Matter.
- Scan the QR code on the device or its packaging, or type in the set-up code.
- Keep your phone near the device. Your phone uses Bluetooth to bring it onto the network.
- For a Thread device, the mobile app asks whether to connect it through Homey Pro or through your phone. Choose Homey Pro to put it on Homey's own Thread network.
A Matter device that is already in another system may need a factory reset first.
Matter also works the other way. Install Homey's Matter Bridge app and Homey Pro can share many of its devices, including Z-Wave and Zigbee ones, with Apple Home, Google Home, Alexa or SmartThings. Some advanced features do not carry across.
Flows: your first automation
Homey's automations are called Flows. A Flow is built from cards in three columns:
- When: the trigger that starts it.
- And: an optional condition that must be true.
- Then: what Homey does.
- Create a new Flow in the Homey app.
- In When, pick your door sensor and the card for the contact alarm turning on.
- In And, pick a Date and Time card that limits the Flow to the hours between sunset and sunrise.
- In Then, pick your hall light and the card to turn it on.
- Save the Flow, then open the door to test it.
Advanced Flow
Advanced Flow puts the same cards on an open canvas that you join up with lines. One Advanced Flow can have several triggers and branches, with extra cards to add a delay or to wait for any or all of a group of steps. It suits anything that would otherwise take several ordinary Flows, such as a morning routine that behaves differently at weekends.
Advanced Flow is included with Homey Pro. It is easiest to use in the Homey web app on a computer. More ideas in Automations and scenes that work.
Satellite mode: extending range with a Homey Bridge
In a large home, Homey Pro's radios may not reach everywhere. A Homey Bridge can be linked to Homey Pro in satellite mode to fill the gap. It is meant for the same building, not a separate one.
The Bridge then repeats Z-Wave and Zigbee signals and gives you 433 MHz and infrared in another part of the house. Everything still appears in the same Homey app, and you can add more than one Bridge.
For most homes, a few mains-powered Z-Wave or Zigbee devices spread around the house do the same job. See Building a reliable network.

Backups
Local backup
Back up Homey Pro to a Mac or PC and keep the file safe. Do this before big changes.
Cloud backup
An optional paid service from Homey that backs up automatically and lets you roll back to an earlier point.
A backup is also how you move to a replacement Homey Pro. See Upgrading or moving to a new hub.
Troubleshooting
- The app can't find Homey Pro during set-up. Check the hub has power, and that your phone has Bluetooth and Wi-Fi switched on and is close to it.
- A Z-Wave device won't pair. Run a removal on it from Homey's Z-Wave settings, then try again closer to the hub. Check it is an 868 MHz device.
- A Zigbee device won't pair. Reset it, and check it is the Zigbee version of the product and not a Wi-Fi or Thread one.
- I can't find my device in the list. Search the Homey App Store for the brand. If there is no app, the device may still pair as a basic Z-Wave or Zigbee device with fewer features. See Will it work with my system?
- A sensor drops off after a few days. It is too far from a mains-powered device. Add a plug or module nearby, or a Homey Bridge in satellite mode.
- A Flow doesn't run. Test each card by itself, and check the And condition is not blocking it.
For more on pairing, see Adding and removing devices. Still choosing a hub? See Choosing a smart home controller.
Devices that work with Homey Pro
 In-wall switchesFit behind your existing switch
 Wall controllersBattery buttons that start Flows
 Motion sensorsFor lighting and security
 Smart plugsSwitch appliances and strengthen the mesh
 Motor controllersFor blinds, curtains and shutters
 Smoke and heat alarmsAlerts on your phone, at home or away