Thanks for purchasing a Vesternet Device for use in your SmartThings Smart Home Controller!
Physical Device Installation
Modules
These Vesternet Devices need directly connecting to your home's electrical wiring system following all applicable regulations and safety standards. You need to be confident in your capabilities in this area, otherwise you can cause damage to the module, your wiring or yourself!
If you'd prefer a Professional installation of your Smart Home Devices you can find further information in our DIY VS Professional guide.
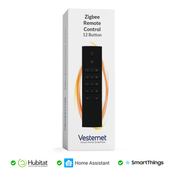
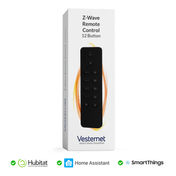
Wall Controllers & Remote Controls
Installation of this Vesternet Device couldn't be easier - simply remove the battery cover, pull out the battery tab and then replace the battery cover.
Wall Controller Devices can be left loose (like a Remote Control) or you can use the included sticker or screws to permanently fix it to the surface of your choice.
For further information on physically Installing your Device, please see the manual download link available under each product page here.
Device Operation
Modules
These Devices usually have one or more switch inputs that control one or more output channels. Some modules support momentary switches, some support toggle switches and some can be configured for both types of switch.
When a momentary switch is connected to an input, the state of the output channel is toggled with every press of the switch and when a toggle switch is connected to an input, the state of the output channel is toggled each time the switch changes position.
For modules that offer dimming capability, a momentary switch connected will also control the dimming level by holding the switch down. The level operates in cyclic fashion - hold the switch and the level will start dimming in one direction, release the switch to stop the dimming, then hold the switch again to start dimming in the opposite direction.
You will also be able to operate the functions of the module from the Smart Home Controller App or Web UI.
Wall Controllers & Remote Controls
These Devices usually have two or more buttons, each supporting Pushed, Held, and Released Events.
These Events will be "mapped" to Triggers within the Smart Home Controller where you will be able to use them to create Home Automation logic.
For further information on operating your Device, please see the manual download link available under each product page here.
Installing the Device Driver
The SmartThings Smart Home Controller needs a "Device Driver" for each hardware Device that you wish to use so that it functions correctly. A Device Driver is a piece of software / code written in the LUA programming language and these are created by SmartThings themselves, by manufacturers of hardware devices or by the SmartThings Community.
Vesternet hardware is no different in this respect, but fortunately for the end user we've created our own Device Drivers for our full range of hardware. This means that you don't need to search and scour the web to try and find code and information in getting the Device to work!
For best compatibility with the SmartThings Smart Home Controller we recommend that you use our supporting Device Drivers.
In order to make the Device Drivers available for your Vesternet Z-Wave devices, simply subscribe to the Vesternet Edge Channel.
Here you can enrol your SmartThings hub to the Edge Channel and then select which of the available Device Drivers to install:

Note that the Device Drivers are first release versions so while they might not be fully functional featuring all features and capabilities, they should be usable for their primary functions.
It should also be remembered that the SmartThings Edge platform itself is still under development and changes there may unintentionally break third-party Device Drivers.
Please report any issues with the Vesternet Edge Device Drivers by submitting a technical request ticket.
Add the Device
Open the SmartThings App on your smartphone or tablet. If you're new to the SmartThings App you can read more about it at the SmartThings Getting Started guide.
- From the SmartThings App Dashboard, touch the "+" in the top right corner of the App, then touch "Add device".


- Scroll down the screen and touch "Scan for nearby devices". The SmartThings Hub will now look for your Vesternet Device.


- Activate "pairing" mode on your Vesternet Device by following the appropriate step described in the manual. For example by pressing a button:

- SmartThings will find the Vesternet Device and add it to the App ready for use. Once completed, check that the Vesternet Device is working fully!


Configure the Device
The Vesternet Device Drivers will offer configuration options that are appropriate for each specific type of device in order to get the main product features and functions working.
If you are happy with the default settings after the Device has been added to your system then the Device is "ready-to-use" immediately.
If you do need to change any of the settings then simply open the SmartThings App on your smartphone or tablet. If you're new to the SmartThings App you can read more about it at the SmartThings Getting Started guide.
Wall Controllers & Remote Controls
Most of these Vesternet Devices are ready to use out-of-the-box and don't have any available configuration settings.
Modules
These Vesternet Devices will typically have configuration settings available for things like changing the switch type, adjusting dimming parameters and updating power reporting data.
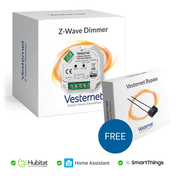
Here's an example showing how to adjust the settings for a Vesternet Z-Wave Dimmer Module.
- From the SmartThings App Dashboard, touch the Device you wish to change settings on, then on the Device details screen touch the "menu icon " in the top right corner. Then touch "Settings" to continue.


- Touch the "Load State After Power Failure" setting and touch one of the options to select it. Now touch "OK" to save the selection.


- Back on the settings screen, touch "Switch Type Attached" and touch one of the options to select it. Again, touch "OK" to save the selection.

For further information on what the available settings mean for your Device, please see the manual download link available under each product page here.
App Control
Once you've installed the Vesternet Device in your system and configured it to suit your requirements, it should be usable via the SmartThings App or Web UI.
Open the SmartThings App on your smartphone or tablet. If you're new to the SmartThings App you can read more about it at the SmartThings Getting Started guide.
Wall Controllers & Remote Controls
Since this types of Device are used for "Input" functionality there's nothing to control from within the App.
- You can however view the current status of the battery on the App Dashboard or by clicking on the Device to access its details screen. Here you can also view the button Events in real-time!


Modules
Typically with modules you'll be able to control the Devices directly from the SmartThings App Dashboard by simply touching on the "switch icon" at the top right corner of the Device tile.
Here's an example showing the Vesternet Z-Wave Dimmer Module.
- With each touch the Device will be toggled to its opposite state. Note that the Device icon changes to indicate the current state too.


- For extended control of the Device, you can open up the Device details page, this time the "switch icon" itself changes to indicate the Device state.


- To control the dimming level you can either touch one of the preset "grey circles", swipe the "slider", or touch the percentage level to open a popup control that allows you to increase / decrease the level manually.


- SmartThings automatically logs data for things like power and energy, creating simple charts to track usage. For Devices that support those features, touch on the "chart icon" to reveal the graph. Touching the "History" tab at the bottom of the screen will open the history of all the previous Events from the Device.
 >
>
- You can also access further screens by touching the menu icon at the top right of the screen, with options for editing the Device name and changing the room that it's in.

Usage in Routines, Scenarios, Automations, Scenes, Schedules & Logic
Open the SmartThings App on your smartphone or tablet. If you're new to the SmartThings App you can read more about it at the SmartThings Getting Started guide.
SmartThings uses the term "Routines" to cover all Home Automation Logic, whether it be creating a Scene, adding a Schedule or implementing an "if this .... then that ...." type Scenario.
Standard Routines
- From the Device details screen, some Vesternet Devices offer device-specific Routines directly.
Here, with a Z-Wave Vesternet Dimmer module, you can see that SmartThings helpfully offers a standard "Timer" option, which is a simple time-based trigger.
Touch the "Timer" Routine and once the "Timer" screen appears you can see that there are options for setting a simple countdown timer. Touch some of the options and then touch "Save".

- Back on the Device details screen you'll see the results. Once the countdown timer expires your selected action on the Device will happen automatically.
Touching the "Slider" to the right of the Timer will alternately disable and enable it.
For more simple time-based Routines, touch the "Routines" tab at the bottom of the screen and you'll now see options for setting a simple scheduled event that turns the Device On or Off

- Here you can see that a weekday schedule has been set for 7am. Touch "Save" when you are done.
Back on the Routines screen you'll see the results and again, touching the "Slider" to the right of the Routine will alternately disable and enable it.

Custom Routines
More powerful Routines can be created using the common "if this .... then that ...." format. Some Vesternet Devices will offer "Events" from the Device locally (such as it turning On or Off for a module or a button being Pressed, Held or Released for a remote control) and some will offer "Controls" for the Device (for example turning it On or Off) in reaction to an Event from a different part of the SmartThings system such as Location or Weather. Of course you can also react to other devices too!
Reacting to Events from a Vesternet Device
Here we'll look at an example using a Vesternet Z-Wave Dimmer module.
- From the Dashboard, touch "Routines".
Once the "Routines" screen appears touch "Add what will trigger this routine" to add a Condition to the Routine.

- Touch "Device status" since we're interested in reacting to a Device Event.
Devices with available conditions will be shown, so touch one to select it.

- The next screen will show the available conditions for the Device.
Here we can select "On or Off" (either event will trigger), "On" and "Off" individually, changes to the "Dimmer" level or Events from one of the supported "Meters".
After setting the condition, touch "Done" and then "Add what this routine will do" to add an Action to the Routine.

- For this example we'll elect to send a push notification to ourselves when the Device is turned On, so touch on "Notify someone" to proceed, followed by "Send notification to members".


- Type in your message, here we chose a simple "Dimmer on!" text, but you could include more information if you wish, for example the room name.
Touch "Done" when you are finished.
At this point you can add further Actions if needed, or simply touch "Save" to save this Routine.

- You'll now be prompted to choose an icon to represent the Routine, do that then touch "Save" again.
Your Routine will now been shown in the SmartThings App!

Controlling a Vesternet Device
Here we'll look at an example of controlling a Vesternet Zigbee Motor Controller.
- Create your Routine in the same was as detailed above, but this time when entering the "Add what this routine will do" section touch on "Control device".
Touch "Control Devices" since we're interested in controlling a Device.
Devices with available Actions will be shown, so touch one to select it.

- For this device we'll select the "Window Shade" Action and then touch on "Open" and finally "Done".


- Touch "Done" again and then "Save" to save the Routine.


- As before, you'll now be prompted to choose an icon to represent the Routine, do that then touch "Save" again.
Your Routine will now been shown in the SmartThings App!

Getting Help and Support
We hope that you are satisfied with your purchase and don't experience any issues with installing and using your new Vesternet Device.
As always, help is at hand should you need it by simply following the links below.